Our Pop Up Camper Remodel
We were gifted an AWESOME garage kept 1999 Coleman Santee Pop up Camper a few months ago. It was in great shape, and perfect as is, but we decided to make it ours. We painted, reupholstered, and altered a few things to modernize the look, and make it a little more functional for our family. It is still a work in progress, but for the most part we are really happy how the interior turned out!
The Camper
Here is the exterior of the camper. It is in great shape, so there
is not much that we are planning to alter. We do plan to add a capped pvc pipe
to the exterior to hold the outdoor rug, and next year we are planning
on installing a window air conditioner unit under the King size bed and
that will have a support bracket where the front cargo area is.
Before and After Pictures of the Interior
 |
| Before view of dinette, king size bed and "potty cabinet" |
 |
| After |
 |
| Before view of cabinets, kitchen and full size bed. The not so pretty valance that you
see over the left side window went all the way around the camper, and
was sagging terribly because the elastic was worn out. I took most of
it down before I snapped pictures because it looked awful and wasn't really necessary. |
 |
| After |
 |
| Before view of the kitchen. The top left open cabinet has a paper towel holder in it.
At first I thought it looked goofy to have an open cabinet like that,
but it really is functional. Now I love it! |
 |
| After |
 |
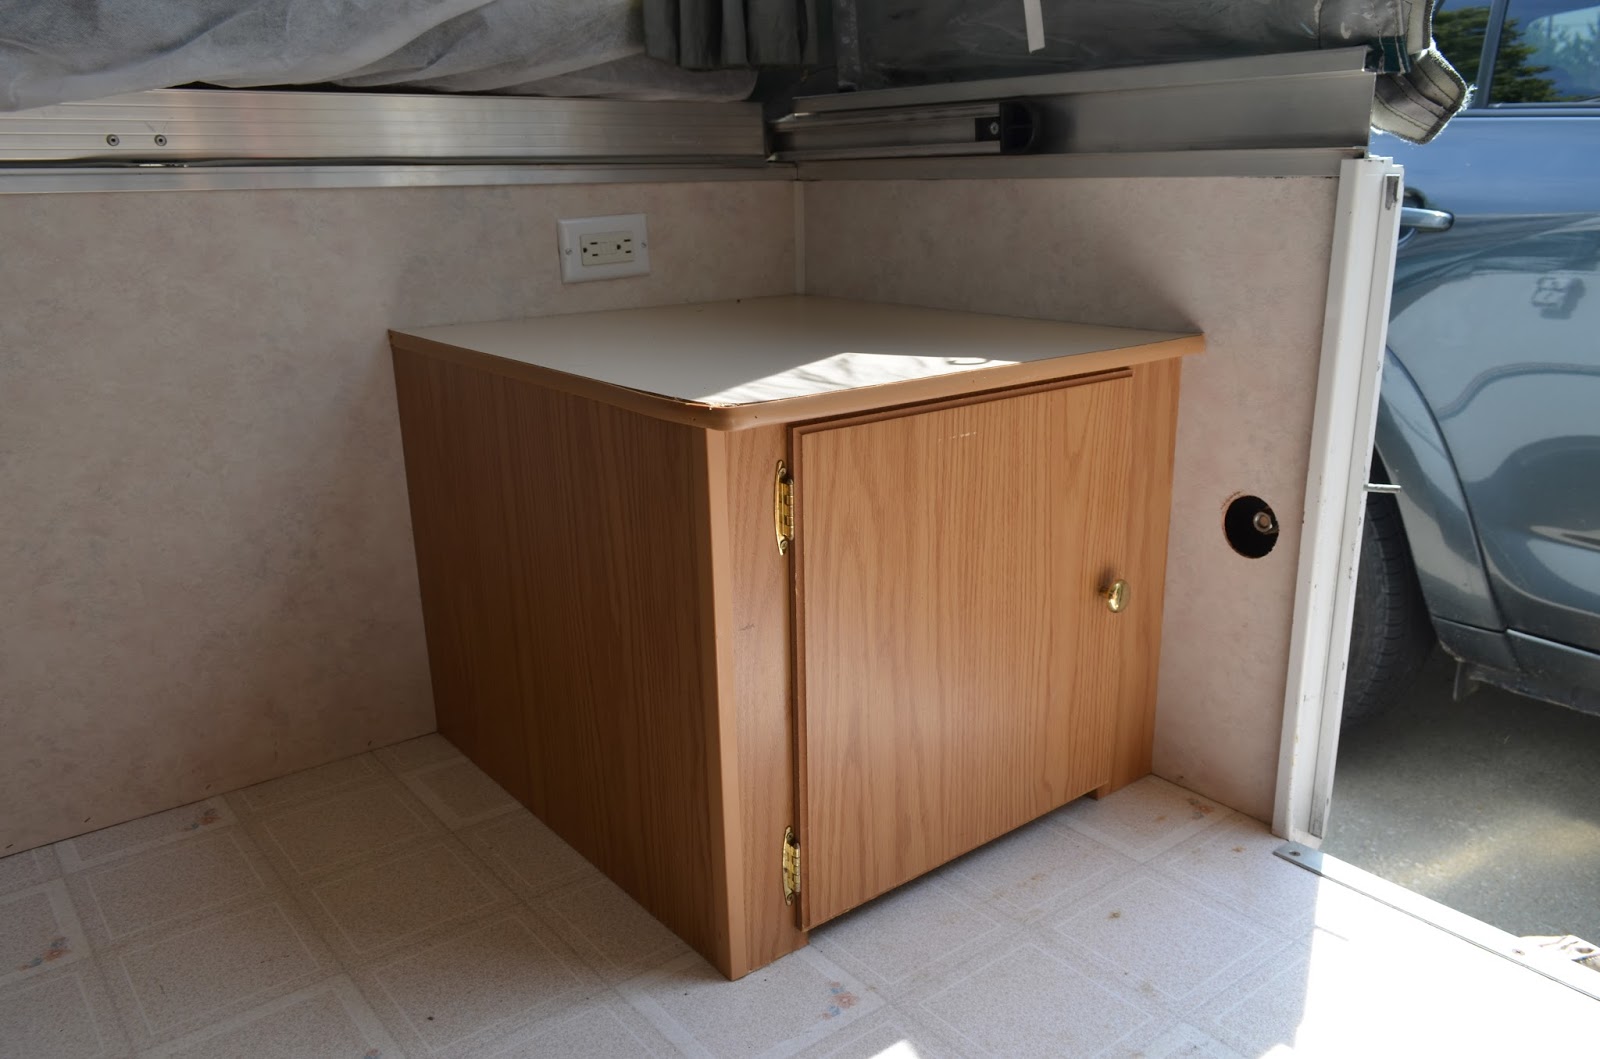
| Before view of the long cabinet. |
 |
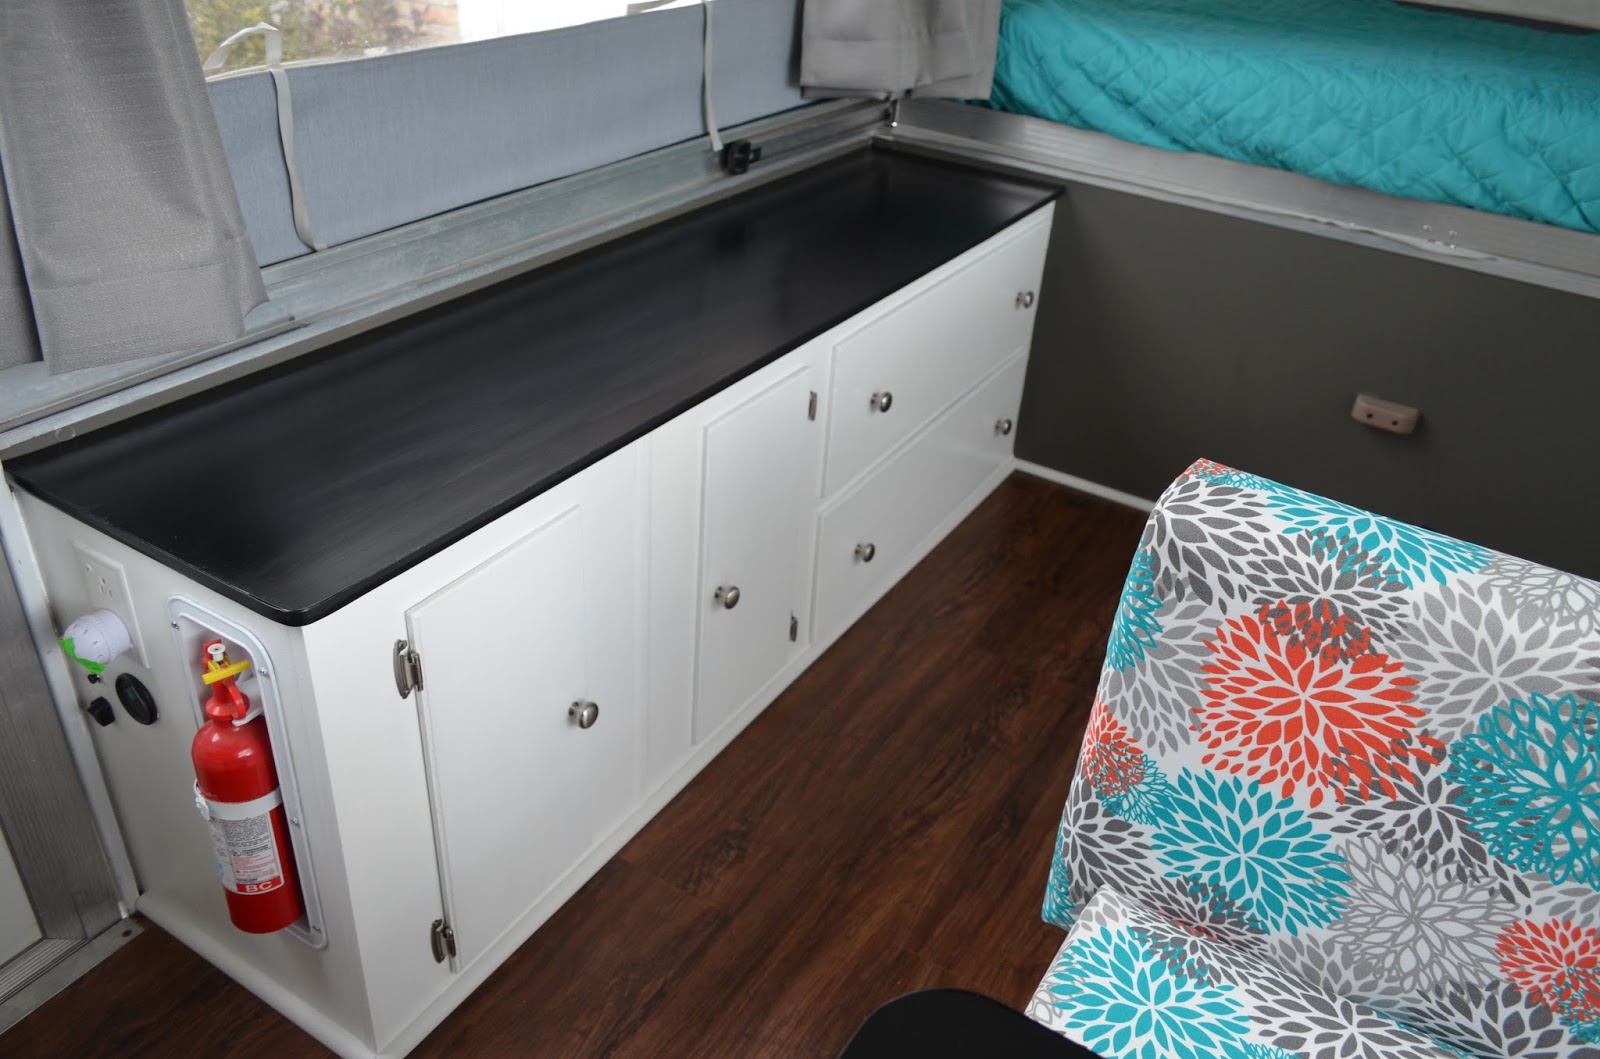
After
|
The New Color Scheme
We ended up finding this flowery outdoor fabric at Hancock Fabrics, and
decided that it would work great for the bench cushions. Outdoor fabric
is really durable, and simply wipes clean when there are spills. This
is so important when you have 3 kids and 2 large dogs! Then we picked
out the grey and white chevron fabric for the valances. We found the
blankets at Sam's Club and they matched perfectly! The solid grey
fabric is a curtain. I bought Eclipse black out curtains in grey from
Walmart and simply hemmed them to make them the correct length.
The Cushions
 |
Sewing the cushion covers was soooo intimidating because I have absolutely zero sewing skills! I searched the web for the easiest way to sew cushion covers and still get a tailored professional look. I didn't want to do the fold and staple method because I was worried that you would see the staples on the rear of the back rest cushions. That's when I came across this tutorial for Sew Easy Cushion Covers! Sooooo easy! Seriously, if you have a cushion covering project, I highly recommend you check out this method. All I had to to was sew a straight line, and I think they look great! The second picture shows the stoppers that were on the original seat cushions to keep them from sliding around. We just screwed the stoppers back on the bottom cushions after covering them. |
The Curtains and Valances
 |
| Pop Up Camper curtains and valances can be quite challenging due to the track system that they are hung on. Finding replacement clips that fit on the track system is very hard and expensive. For the curtains, I ended up re-using the clips and followed The Pop Up Princess technique for epoxying command hooks onto the clips and sewing drapery rings on the top of the curtains. I found that the drapery rings kept popping out of the command hooks when we were adjusting the curtains or lowering the pop up, so I needed to find a solution because it was driving me crazy. I had bought a package of small clear hair rubber bands for my girls, and tried tying them on the command hook over the drapery rings. This worked GREAT, and now the curtains stay on the hooks, but they are still removable for washing! I love the Eclipse Black Out Curtains that I bought! They really do block out light, and help with privacy at night. | |
|
|
For the Valances- I cut the back strip (that had the clips that fit on the track) off of the original valances and sewed them on to the back of the new valances. Then I made a 1" channel in the back of valances for new elastic and threaded it through. This was by far my most frustrating sewing project! I really don't know how to sew....it was a lot of trial and error! I wish they were a little fuller, but I needed to keep them the same length as the originals because I was re-using the back strip with the clips. Overall, they are not perfect, but I am happy with how they look!
The Floor
 |
| We decided to use a floating click-together plank style vinyl flooring (Allure Ultra in Vintage Oak Cinnamon) from Home Depot. We were going to use the stick together type, but after learning that the adhesive on these floors may not do well in high heat, we went with the floating floor. Although the floor is not glued down, it is held in place really well with the quarter round molding and the new "potty cabinet" is screwed through it holding it firmly in place. The quarter round hides the gap from the floor around the edges, but also finishes off the look nicely. We simply laid the new floor over the existing vinyl flooring. I love how durable and expensive looking this floor is!!!! |
The "Potty Cabinet" Modification
One of the major changes to our camper was the "potty cabinet" situation. It simply wasn't functional for our family. We would have to open the cabinet, move all the other stuff out of the way, and pull out the port a potty every time the kids needed to use it. Then they would have to use it in the middle of the floor. After that, we would have to put the port a potty back in the cabinet because it was in the way. This was a pain in the middle of the night, and usually ended up waking everyone up. After checking out
The Pop Up Princess website, I really liked the "potty cabinet" that their camper came with. I decided to try to build something similar for our camper. I really don't have any wood working skills at all, but I decided to give it a try anyways.
 |
| Before. |
 |
| After. |
 |
| Open |
 |
| Storage cabinet |
The new "potty cabinet" has a storage area , and then has a counter
top/lid over the port a potty that lifts up! Now the kids can simply
lift up the counter/lid and use the potty in place. It never has to
move, and it's not in the way anymore! It's funny, because when the
camper was done and the kids were checking it out, I asked them what
their favorite thing was. I was expecting them to say the bench
cushions, or the valances or something like that....their answer was
"The Potty Cabinet"!!!!! I was worried about this project, but am really happy with how it turned out. Now it is so much more functional!
The Cabinets and Counter Tops
 |
| The cabinets got a coat of white primer, and then 3 coats of Dutch Boy Cabinet and Trim paint in Ultra White. My sweet husband changed out the old brass hardware with new brushed nickel knobs and hinges. We just bought the contractor pack to keep the cost to a minimum, and they worked great! The counter tops were sanded and then got several coats of Rustoleum Spray Paint in Black, and then about 5 layers of Polyurethane to protect them. |
The Table
 |
| I picked up some orange flowers to accent the table. The pot has chalkboard paint on it, so I decided to get creative and drew this cute "Let's Go Camping" design that I saw on pinterest with a chalk marker. Found the table runner on clearance at Target and it matched perfectly. I think it's so pretty! |
|
 |
| I spray painted the old table legs metalic silver, and spray painted the rest black. Then I added lots of layers of polyurethane to the top. I bought some new black t-molding for the edging of the table because the edges get scuffed pretty easily. | | |
Thanks for checking out our camper remodel! I will try to post more pics of any further modifications. I think adding an air conditioner is next. Kinda nervous about that one!